Age verification is crucial for ecommerce stores selling age-restricted products. In this tutorial, we will guide you through the process of how to add Shopify age verification to your online store.
With the right app, you can utilize customizable age verification pop-ups, age restriction settings, and other features to help you comply with legal requirements and protect your customers.
How to add Shopify age verification to Shopify (using an app)
As an ecommerce store owner, ensuring legal compliance and protecting your customers, especially when dealing with age-restricted products, is of utmost importance.
Adding age verification to your Shopify store can help you meet legal requirements, prevent underage purchases, and establish trust with your customers. In this tutorial, we will provide you with a step-by-step guide on how to add age verification to your Shopify store.
Step 1: Choose an Age Verification App
To add age verification to your Shopify store, you’ll need to select a suitable age verification app from the Shopify App Store, since Shopify doesn’t have this type of functionality built in. Some popular options include NA Age Verification, Hulk Age Verification, and Onlyage. Evaluate the features, pricing, and reviews of each app to find the one that best suits your needs.
Shopify age verification apps to consider
Here is a list of popular Shopify apps for age verification, along with their pricing and key features:
- NA Age Verification: Free plan offered. Comes with age verification popups for your entire online store and just the checkout module. You can verify age by asking for a birthday or just by using a checkbox or yes/no field. There’s a significant amount of style control with this app, along with tools for only publishing the verification popup on specific pages. It also works with any Shopify theme.
- Hulk Age Verification: Free plan available. Premium plans starting at $10/month. Customizable age verification pop-up, ability to set minimum age requirement, customizable design options, support for multiple languages, and integration with Google Analytics.
- Onlyage ‑ Age Verification 18+: Premium plans starting at $2.99/month. Age verification app with cookie control, page targeting, and quick identifying of underage visitors. It features unlimited customizations and popups.
- Age Check Age Verification Ace: One plan for $3.99/month. Includes options to check the ages of all visitors, and to restrict the selling of products to underage customers. Make popups, customize the verification modules, and add terms to the popups.
- Coming Soon and Age Verification: Has a free plan, and premium plans starting at $1.99/month. Build landing pages that include age gates. The pages also have email collection boxes and customization tools to combine things like countdown timers and preloaded icons alongside the age verification section.
Step 2: Install the NA Age Verification App
You are more than welcome to use one of the other apps from our list above, but for this tutorial we’ll use the NA Age Verification app (formerly known as Age Checker 3).
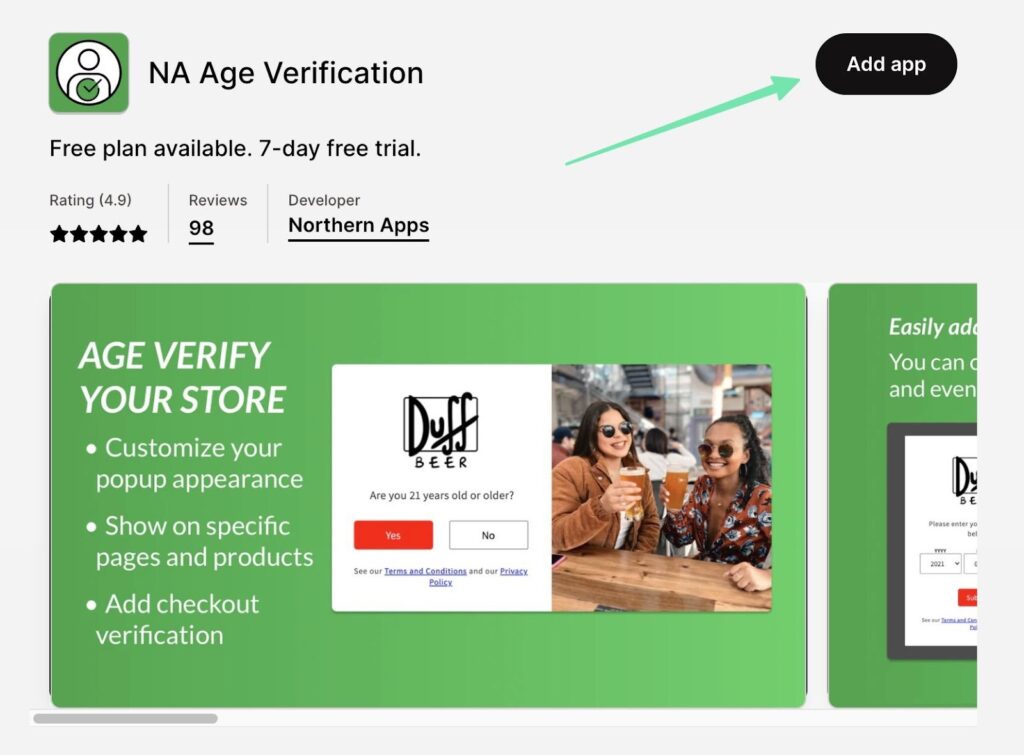
To begin, visit the Shopify App Store (or by going to Apps > Add Apps in the dashboard) and search for “NA Age Verification.” Alternatively, you can go straight to the NA Age Verification page.
Click on the Add app button to install it on your Shopify store.
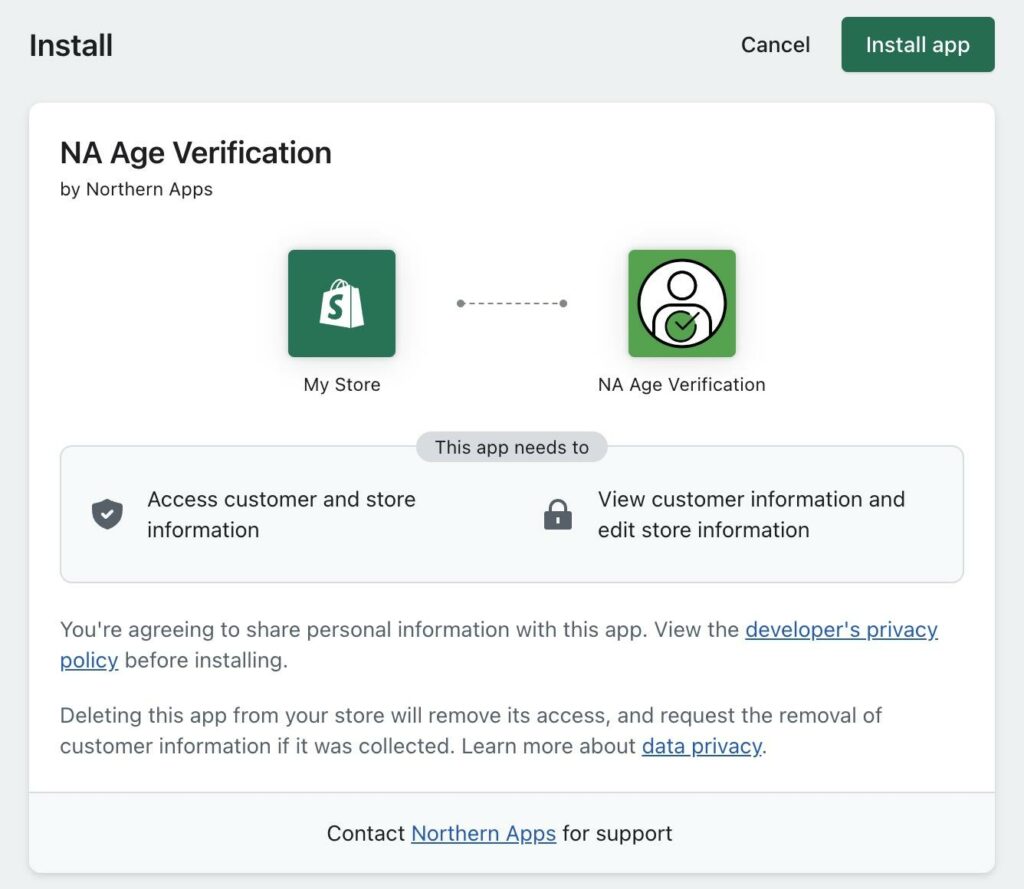
Follow the prompts to grant necessary permissions and complete the installation process.
Step 3: Configure General Verification Settings
Once the app is installed, access its settings by clicking on the Apps section in your Shopify admin panel, and then selecting NA Age Verification.
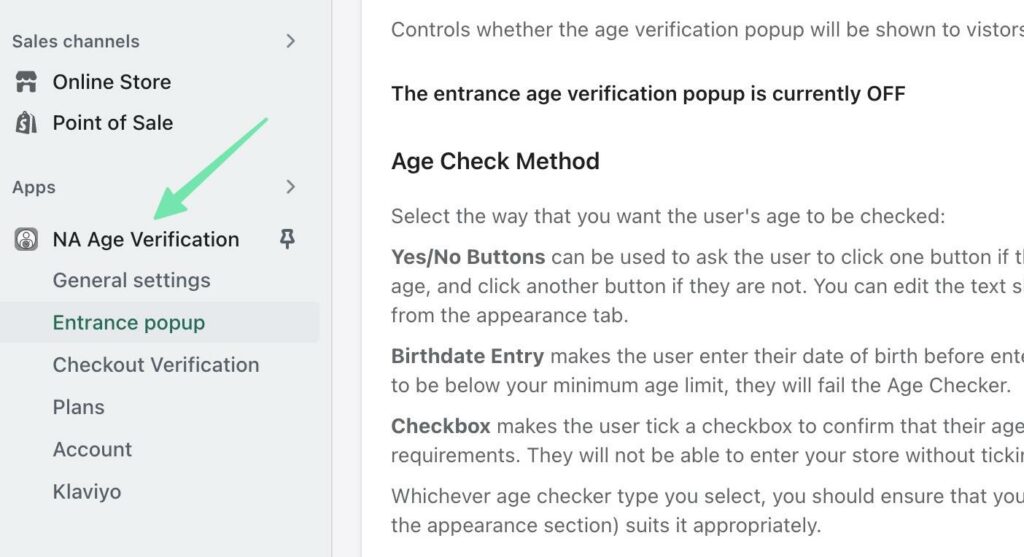
Choose the General Settings tab to automate all verification on your website, and to configure settings like the minimum age allowed on your store.
There are only two settings in this section:
- Minimum Allowed Age: Change it to whatever age you want to permit on your site.
- Date Labels: These are fields displayed only when you ask for birthday entries.
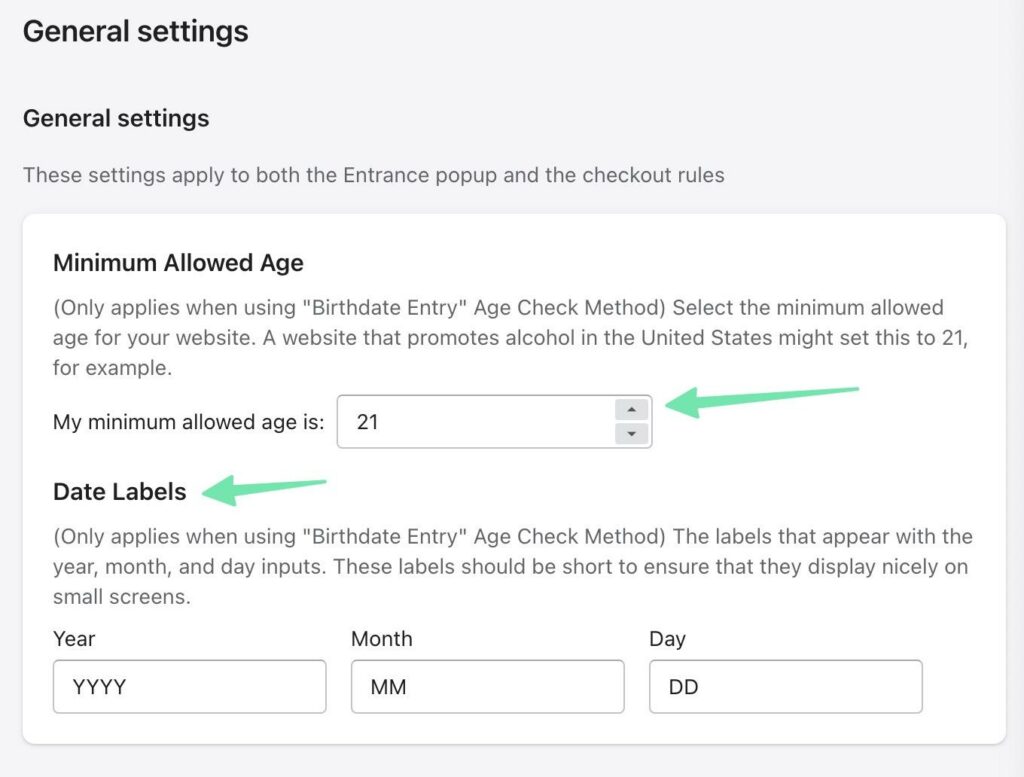
These two settings serve as global requirements for both the entrance popup and checkout verification provided by the NA Age Verifier app. Therefore, you must still activate the popup or checkout elements for any type of verification to occur.
Step 4: Customize Settings for the Entrance Verification Popup
The entrance popup gets displayed the moment a user lands on your website.
To activate and customize this popup, go to the Entrance Popup tab, then scroll to the area titled Entrance Age Popup On/Off. Click the Turn On button.
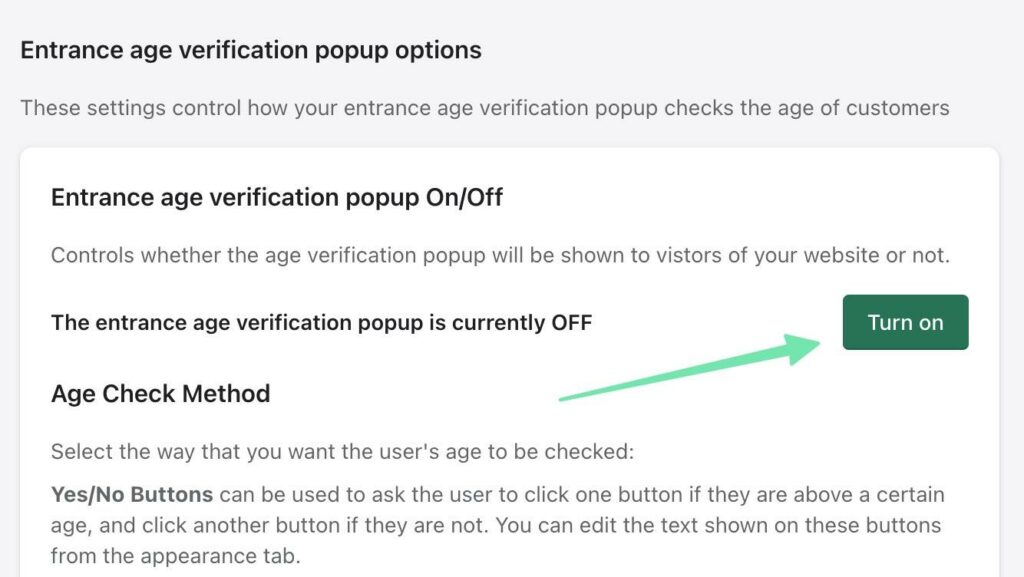
You have three methods to check the ages of users on your website:
- Yes/No buttons
- Birthday entries
- Checkboxes
Pick the one that makes the most sense for your brand. Under Session Duration, select to either verify a user’s age after a certain period of time or every time they visit your website. This uses browser session cookies, so you should also set how long a user’s sessions last.
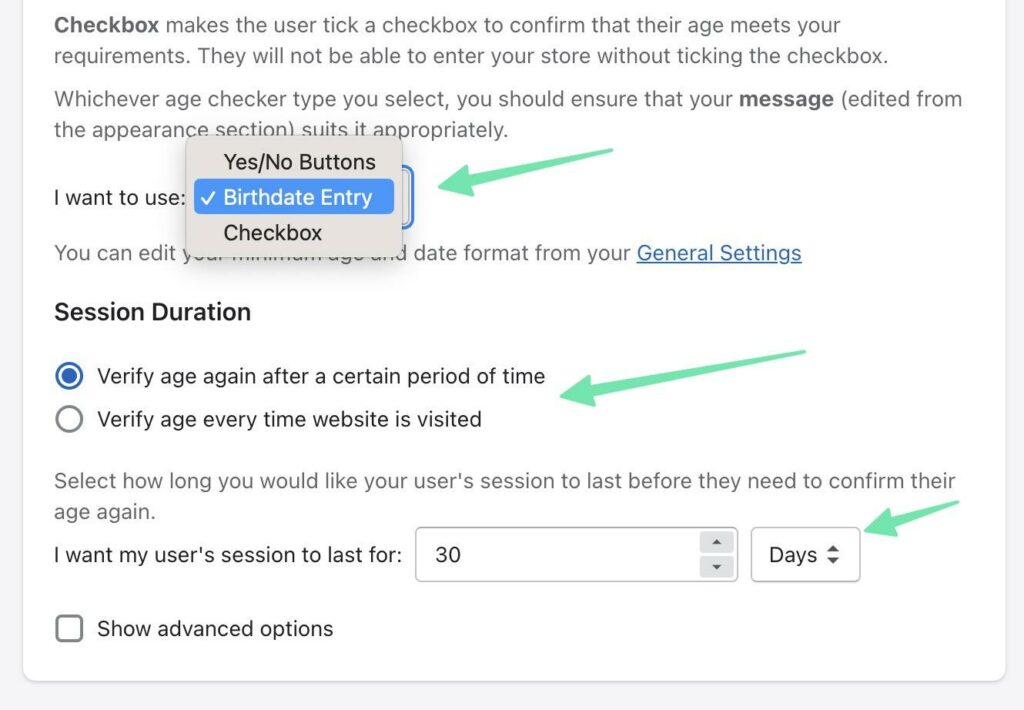
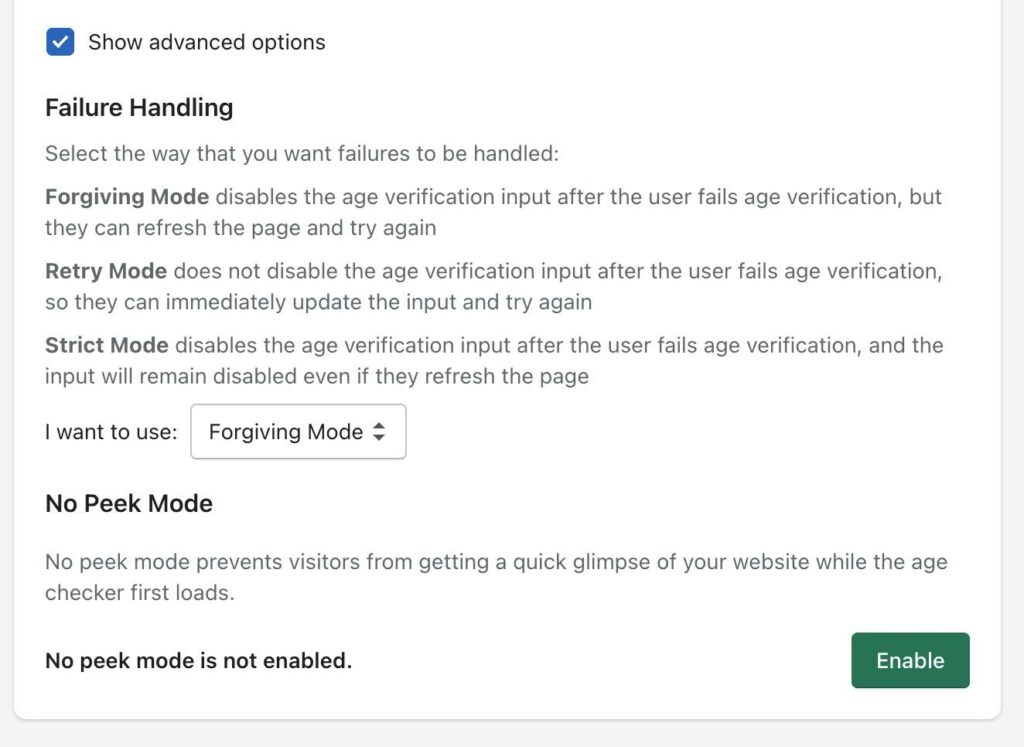
We also suggest opening the Show Advanced Options area to adjust settings for:
- Failure handling: How the system responds if someone fails the verification test.
- No peek mode: A way to block users from getting a glimpse of your website while the age verification system loads.
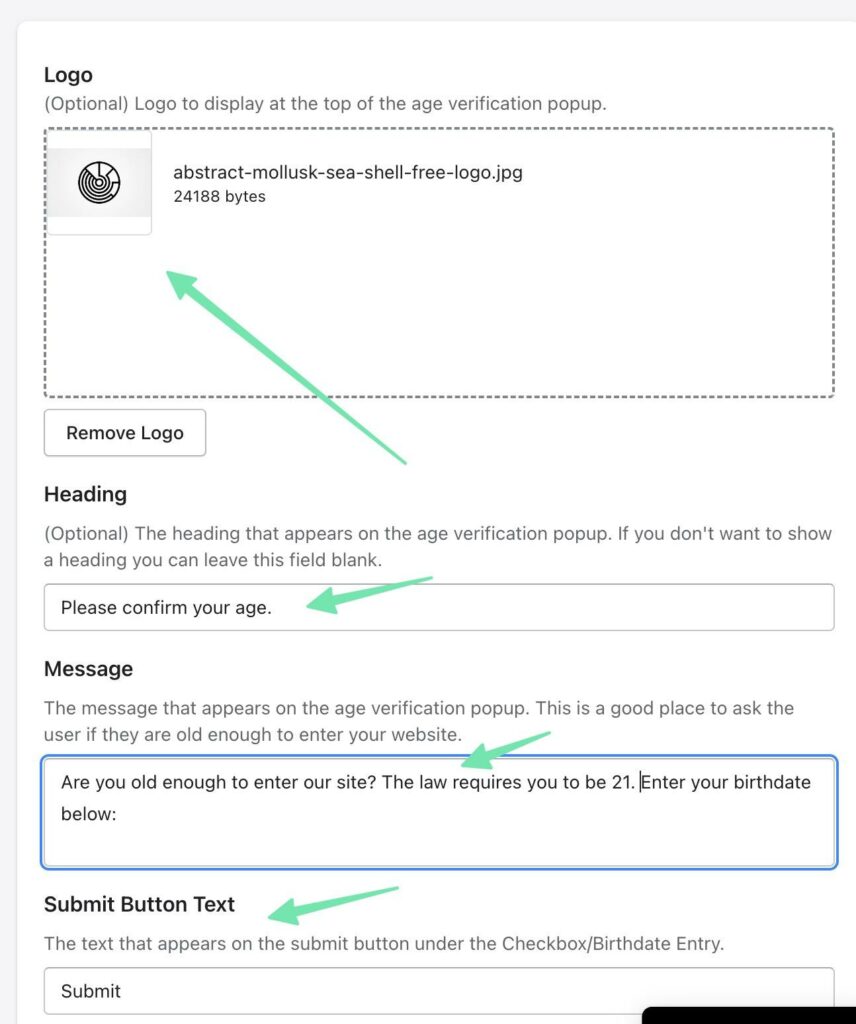
Next up, you can customize the appearance of the age verification popup. Start by adding a logo to the popup by clicking Add Images. We also recommend inserting a Heading, Message, and Submit Button Text to clarify with users why they’re being asked about their age.
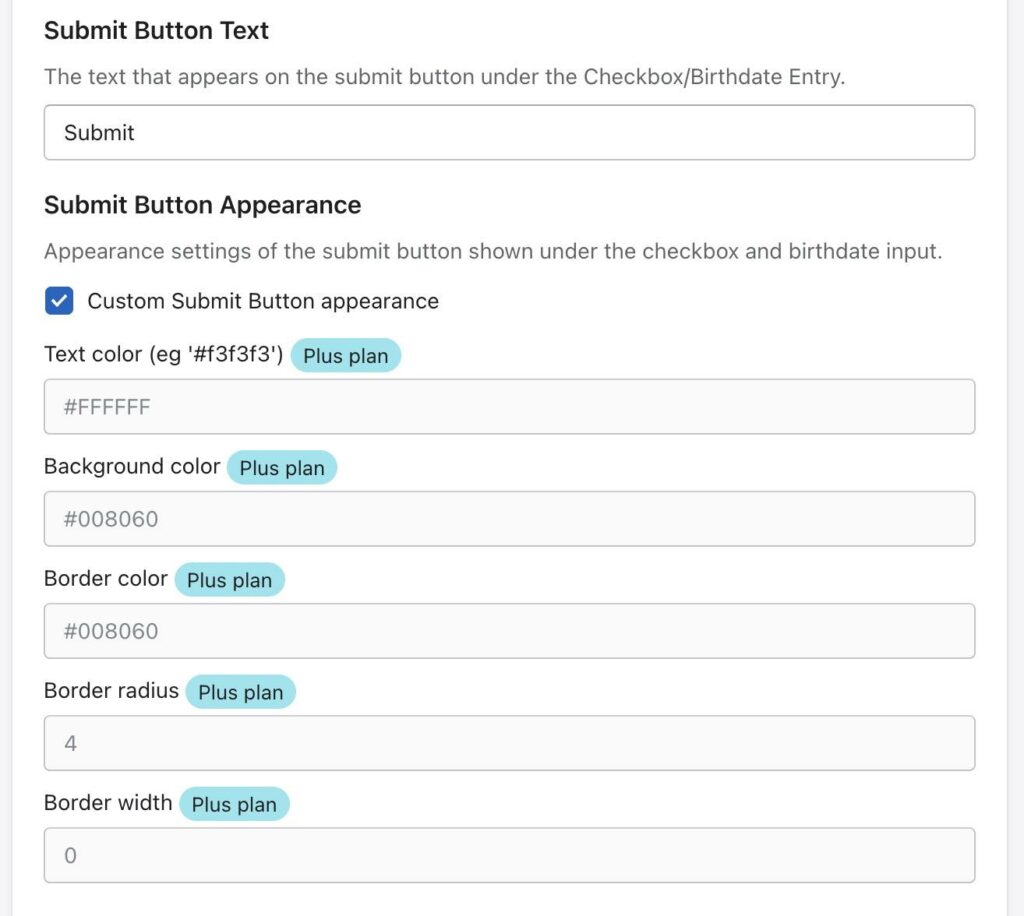
The Submit Button Text field is fully customizable. You can also check the Custom Submit Button Appearance box to reveal granular control for things like text color, background color, border radius, and border width.
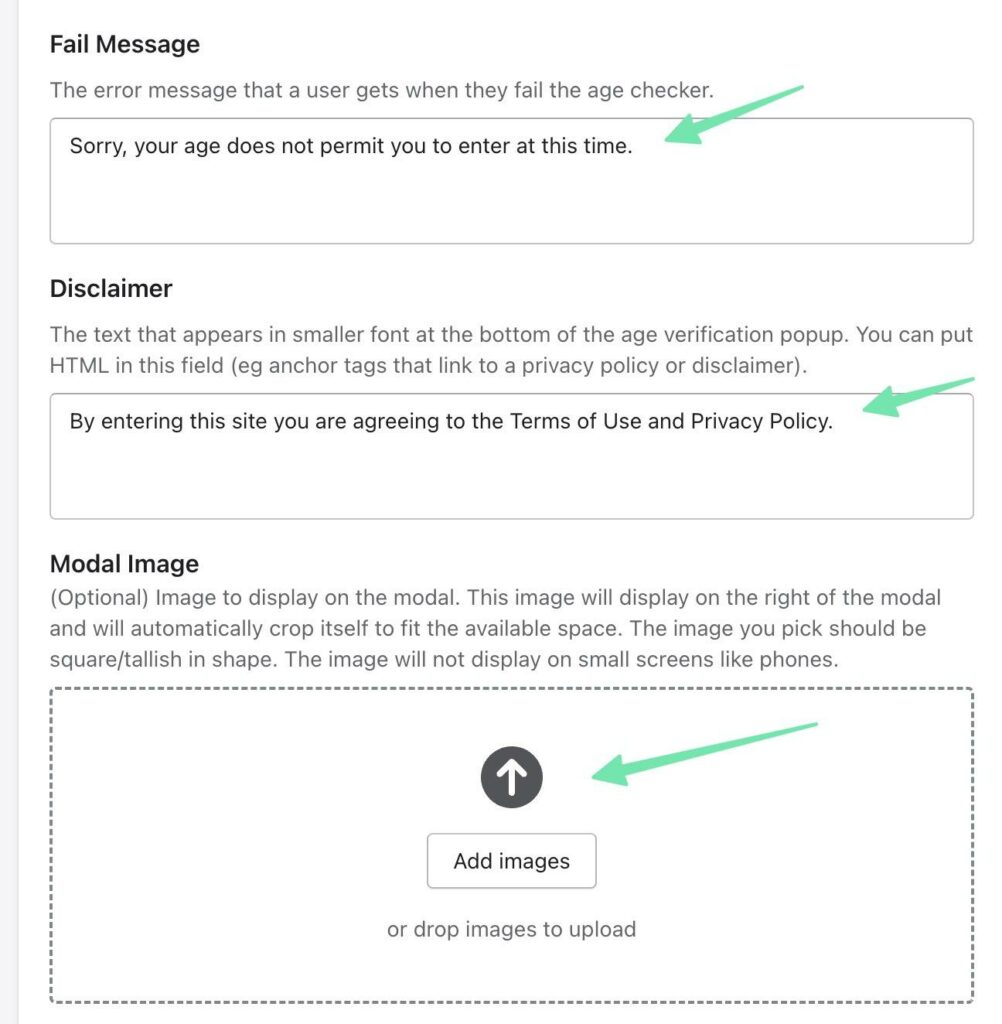
But what happens if someone fails the verification? That’s where the Fail Message field comes into play. Type in a message to explain that you cannot permit the user to enter the store. Underneath that, type in a disclaimer. The Modal Image field is there if you’d like to add another image to the popup.
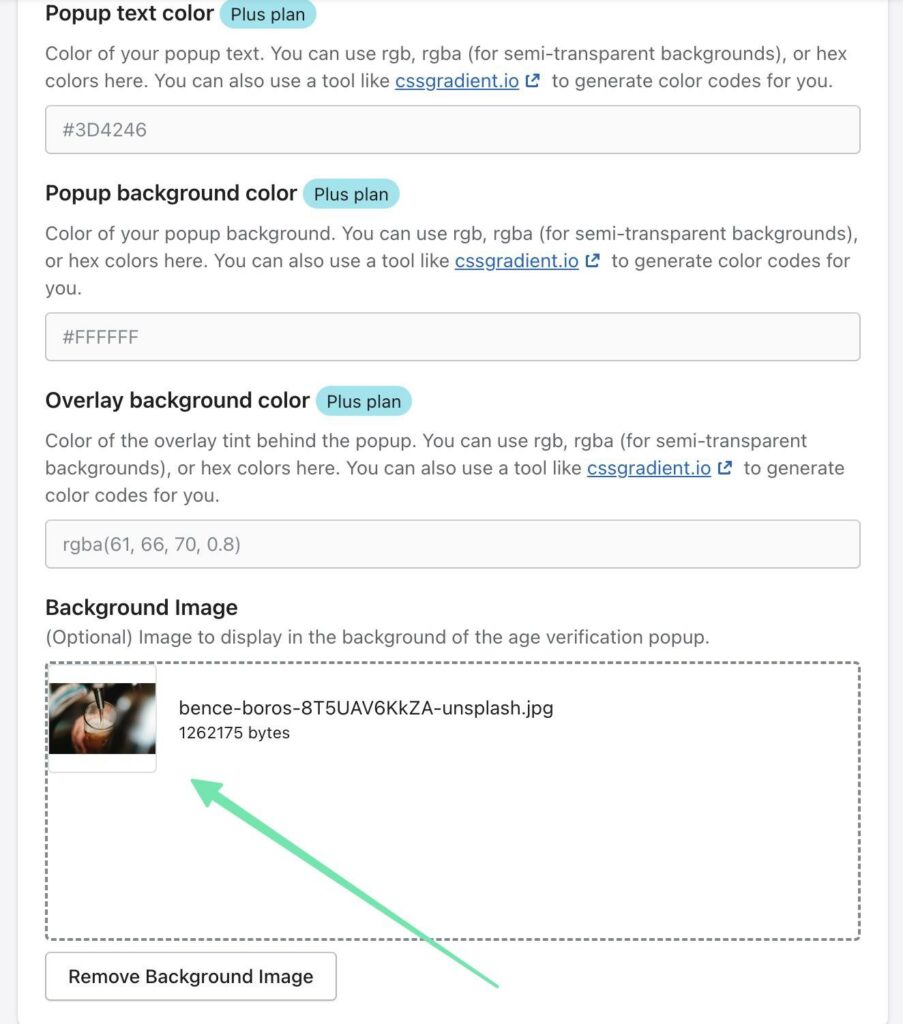
As for styling the popup, you have a few options to control the text, popup background, and overlay background colors. Those, however, are only available in the Plus plan of the NA Age Verification app. It’s free to upload a background image, though.
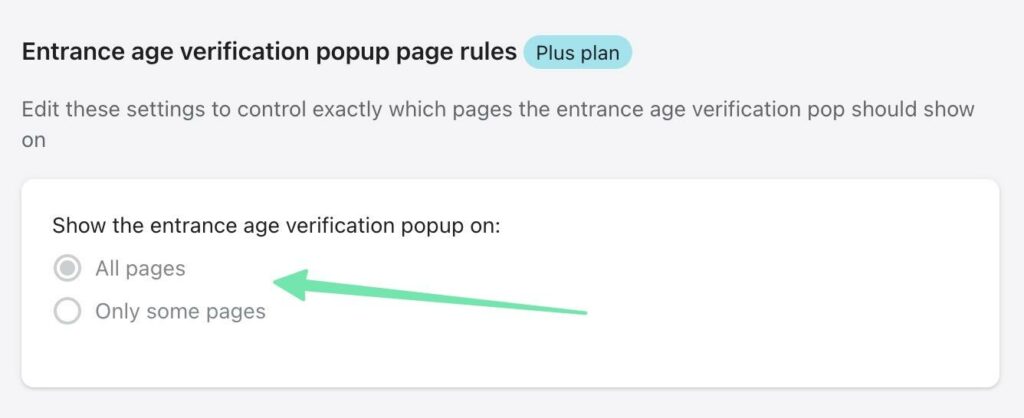
The final setting for the entrance popup is configuring which pages the popup appears on. This is a Plus Plan feature. Essentially, it allows you to either show the verification page on all of your pages or only some specific ones.
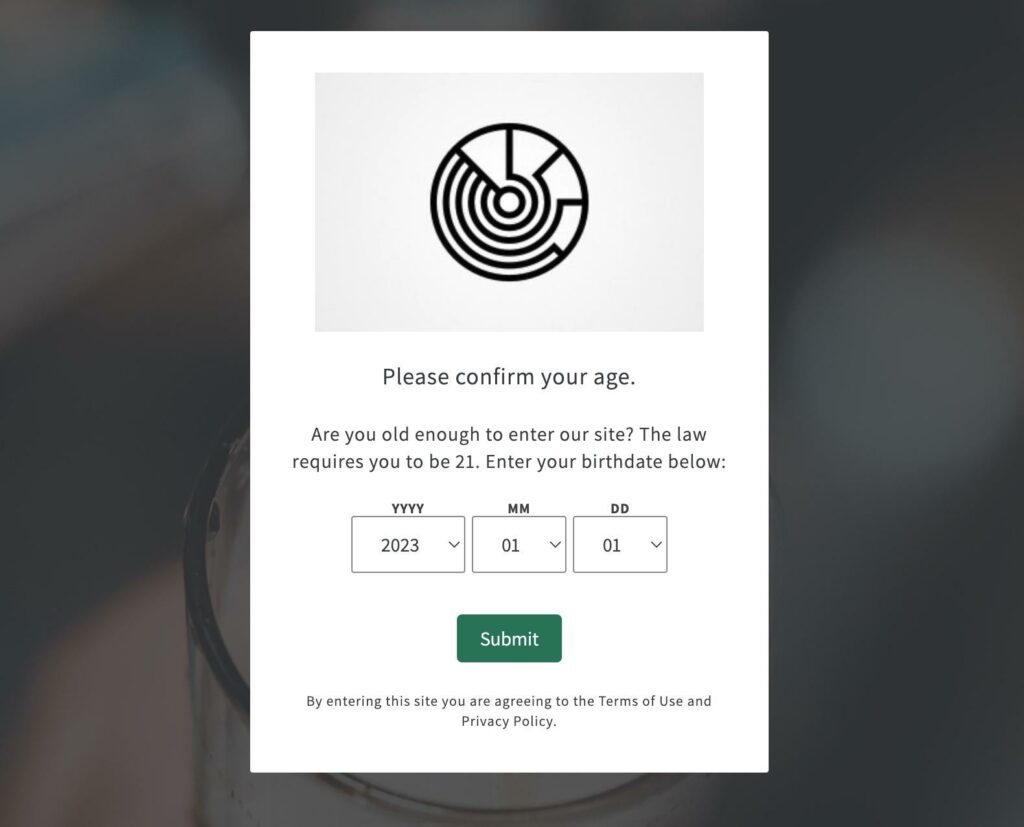
When it’s all done, go to the frontend of your website to view the age verification popup.
Depending on your settings and customizations, you may see a birthdate field or an option asking how old someone is. You should also check if all of your stylings are correct, like the background, colors, and logos.
Step 5: Set Age Verification for the Checkout Area
Some stores may not want or need to inhibit users from browsing their website with an age verification box. Yet, they still require age verification if someone intends to purchase something from the store. In that case, you can add a verification module to the checkout area.
To achieve that, go to the Checkout Verification tab under NA Age Verification. Keep in mind that all age verification for the checkout is activated by signing up for the NA Age Verification Plus Plan.
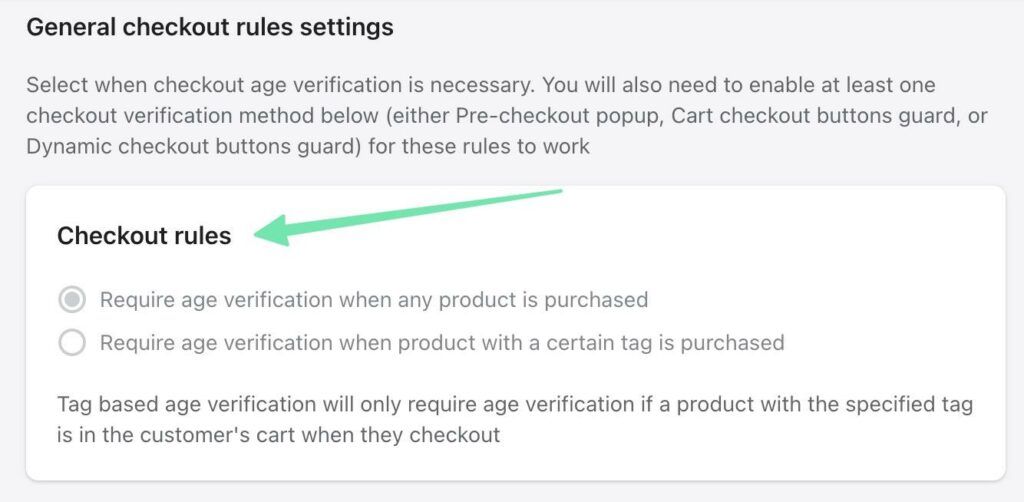
Begin with the Checkout Rules area. These settings let you either:
- Require age verification when any product is purchased
Or…
- Require age verification when a product with a certain tag is purchased
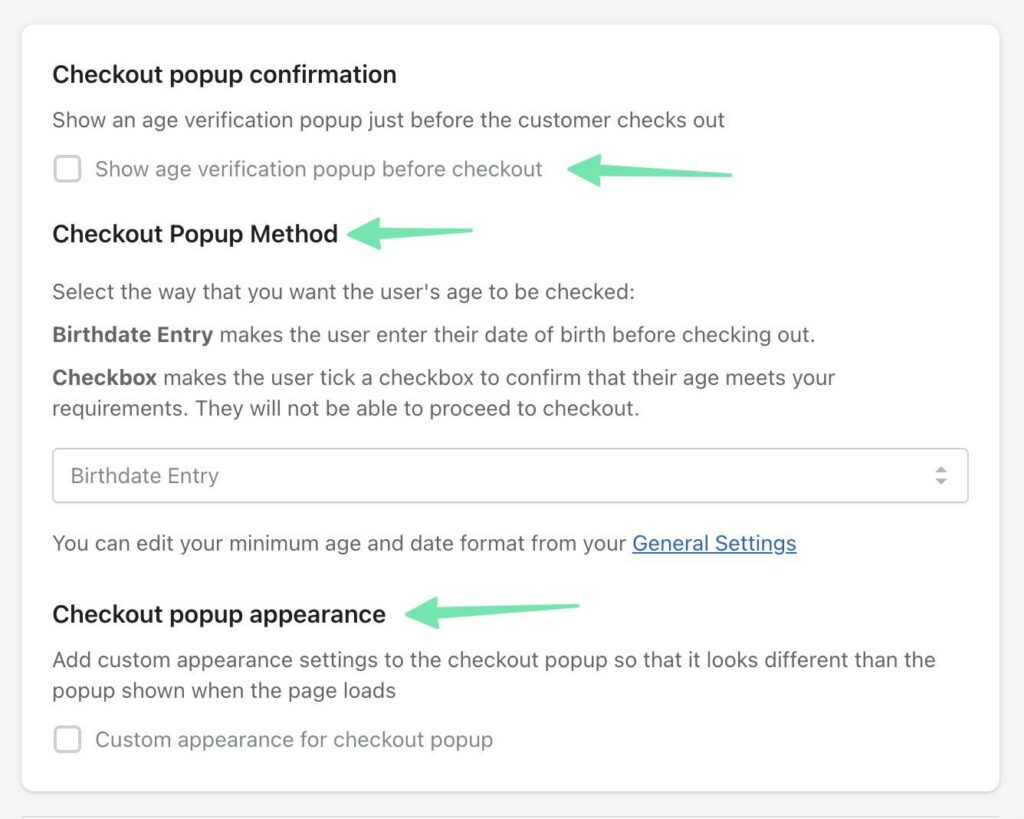
Next, scroll to the Pre-checkout Popup section. This allows you to display a popup before someone tries to make a purchase, rather than waiting for them to get to the end of the checkout process.
Within this section, you can:
- Activate the option to show age verification before checkout
- Choose a popup method—like for a birthday entry or checkbox
- Modify the checkout popup appearance (checking the colors and backgrounds)
The following settings are more for specifying where and how you’d like the age verification popup to appear within the checkout. For example, some stores may only want to have what’s called a checkout button guard, which is a small checkbox and warning right before the Checkout button.
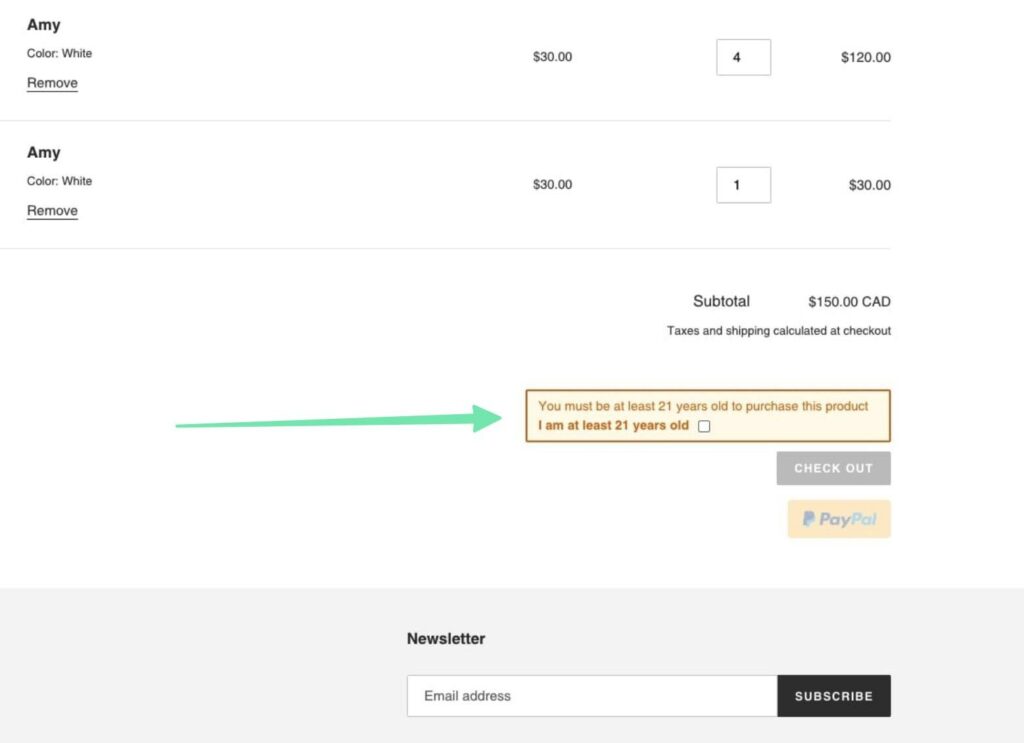
Other than that, you can set:
- An option to disable the cart checkout buttons until age verification
- The cart checkout method, like with a birthday entry or checkbox
- The cart checkout button confirmation description, which is some help text to explain what the confirmation is about
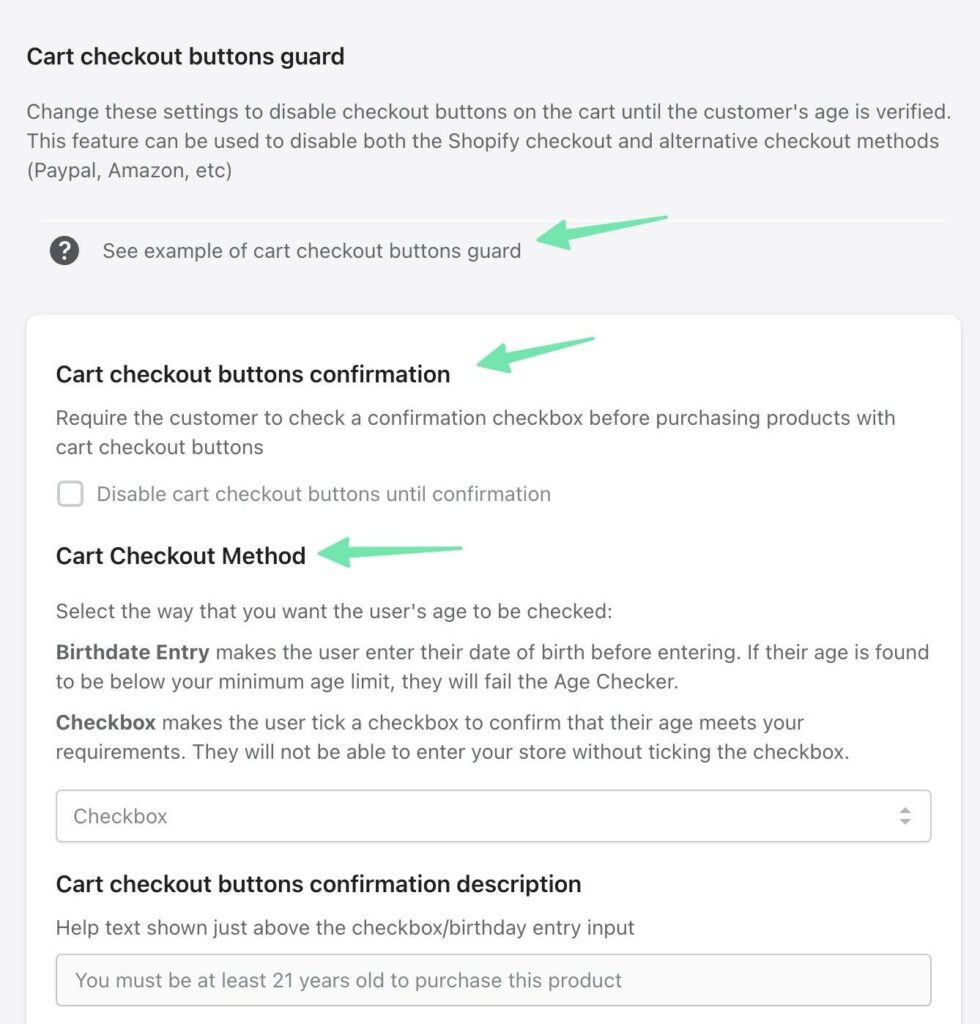
Finally, the checkout verification offers settings for dynamic checkout modules, which may show different content depending on the user and page.
Dynamic checkout buttons look like this, but can reveal unique messages based on the user:
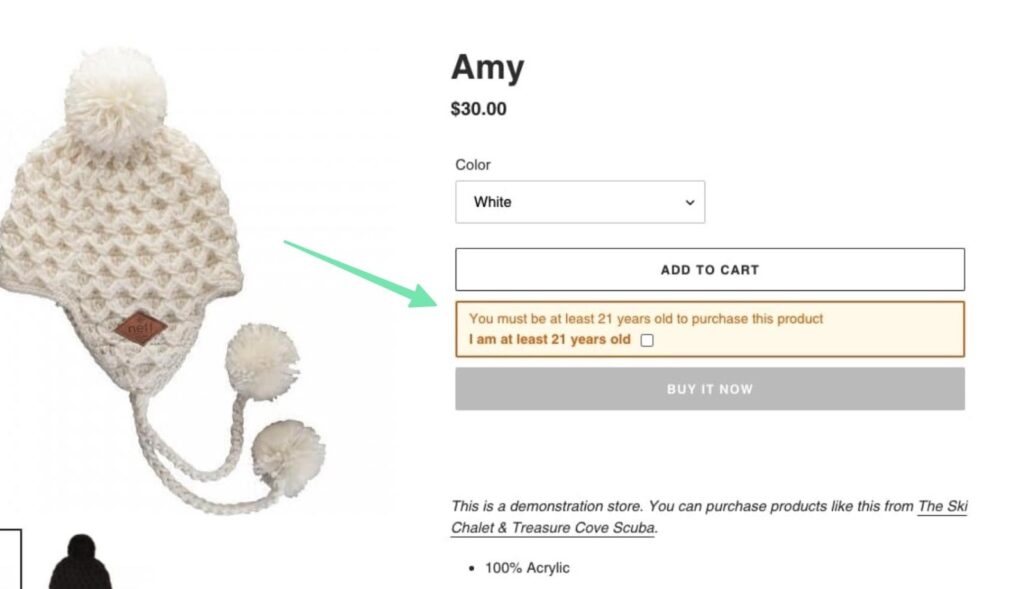
Under the Dynamic Checkout settings, you can set:
- Dynamic checkout buttons, with options for disabling until age is verified, allowing without age verification, and hiding dynamic checkout buttons
- Dynamic checkout methods such as birthday entries and check boxes depending on the user
- Confirmation descriptions for explaining how old someone must be
- Confirmation text that the user would choose to specify their age
- Button guard appearance, which offers settings for changing the colors and fonts within the button guard

When that’s all done, simply save your settings and check to see how the age verification looks and works in your checkout!
Step 6: Test and Monitor the Age Verification Process
Before making the age verification live on your store, it’s crucial to test the process thoroughly. Place test orders and verify that the popup appears correctly, customer age verification is enforced, and customers are redirected appropriately based on their age. This step helps you identify and fix any potential issues or glitches.
- It’s essential to test the age verification process before making it live in your store.
- Visit your store and browse the pages or products where you have enabled age verification.
- The age verification popup should appear based on your settings.
- Enter a valid birthdate that meets the minimum age requirement to proceed.
- Verify that customers are redirected accordingly based on their age.
- Repeat the process for different scenarios to ensure the age verification works as intended.
It’s also important to monitor the performance of the age verification over time. This helps understand if the age verification is working, and if of-age customers have issues with it blocking their attempts to make purchases.
Here’s how to monitor the age verification process:
- Track conversion rates.
- Get user feedback through customer support channels and surveys.
- Log all issues reported by customers.
- Use this information to optimize the verification process and make necessary adjustments to improve the user experience while maintaining legal compliance.
Bonus Step from NA Age Verification: Capture Birthday Data
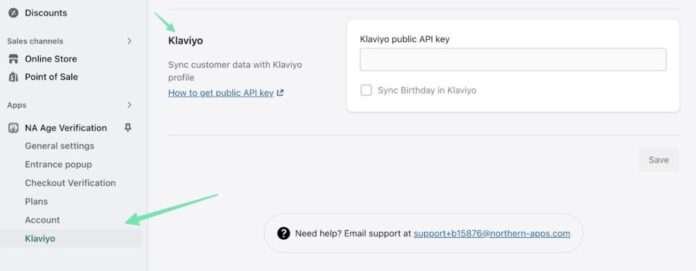
One advantage of using an age verification app is that some of them let you sync birthday entries with your email marketing platform. For example, the NA Age Verification app syncs with Klaviyo.
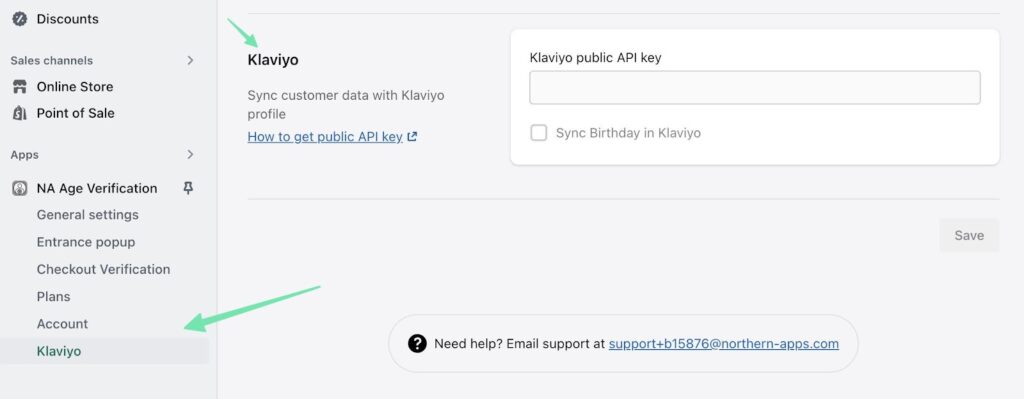
This way, you can keep out underage users and also obtain birthday information from people who are the right age for your products. Then, send out birthday promotions via email!
Our Conclusion on Adding Shopify Age Verification to Your Online Store
Whether you sell vaping items, alcohol, CBD, or other products that require age verification, adding an age limit to your online business is a crucial step in ensuring legal compliance and protecting your minors from harmful items.
By following the step-by-step guide provided above, you can seamlessly integrate age verification into your store and prevent underage purchases.
Remember to choose a reliable age verification screen, customize the pop-up to match your store’s branding (potentially with templates), test the process thoroughly, and monitor its performance over time.
By doing so, you’ll enhance trust, meet legal requirements, and create a safer shopping environment for your customers.
Have you added age verification to your ecommerce store? If so, please let us know in the comments which app you use.
Post Disclaimer
The information provided in our posts or blogs are for educational and informative purposes only. We do not guarantee the accuracy, completeness or suitability of the information. We do not provide financial or investment advice. Readers should always seek professional advice before making any financial or investment decisions based on the information provided in our content. We will not be held responsible for any losses, damages or consequences that may arise from relying on the information provided in our content.


